Hello, I am rebuilding a wrecked Le Mans 1. I have three calipers, a front and rear master cylinder. Can someone tell me how they are linked and plumbed to the bike please. The bike was disassembled years ago. I have bits in numerous boxes. A plumbing schematic would be great. I have no brake lines so can’t work it out. Thanks. Sorry to be a pain.
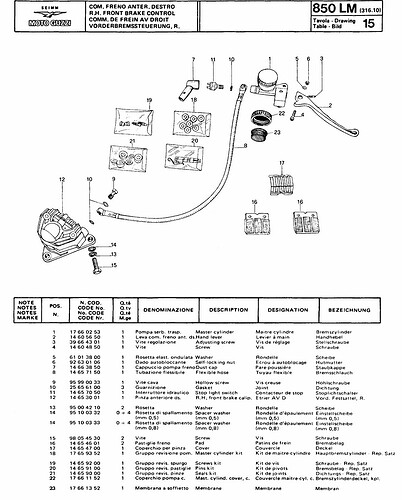
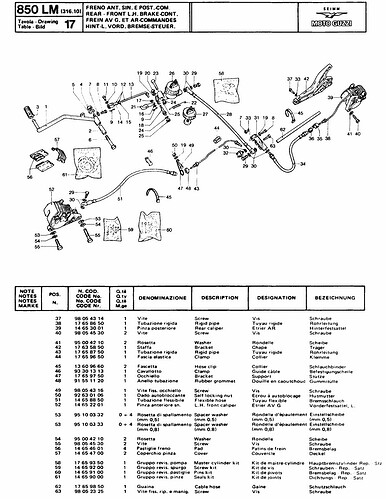
Have a look in the parts book available on the Guzziteque
The handlebar lever connects to the front right caliper, that one is nice and simple.
The pedal brake master Cylinder has an outlet that goes to a splitter manifold on the left side of the bike just behind the side panel. From there feeds a pipe to the rear caliper (out of the bottom) and a second pipe feeds forward to the front left caliper.
The manifold also has an outlet for the brake light pressure switch
Dom has it spot on, parts diagram is a good guide as to what you need and what connects to what, all you need is where the parts fit on the frame.
Note the metal bundy tubes in the rear / linked set-up, so not just long flex pipes - it’s surprsingly complex.
A bundy tube from the rear splitter block runs alongside the top lefthand frame rail and stops just under left side of fuel tank, then there’s a joint to a flex pipe which goes down to left front caliper.
It’s possible the bundy tubes could be replaced with good quality braided flex lines that won’t expand under pressure.
Thanks all. I have been trying to source a replacement rear brake master cylinder. Brembo don’t make them now, and a pattern part appears to be out of stock everywhere.
The bore on mine is somewhat corroded with tiny pits and scratches.
What have others done to renew this part?
I have never had one bad enough to warrant replacement, I have always got away with fitting a new seal kit. If you think it does need replacing, try Gutsibits or ReBoot Any big block model from the late 70’s, early/mid 80’s should be okay to use such as a T3, California 3 etc.
Like Don, I’ve never needed to replace a rear one. I’ve heard good things about these people from someone. Can’t remember where. I’ve been thinking of taking my large, round front Brembo master cylinder in for them to rebore, because it has got a bad bore.
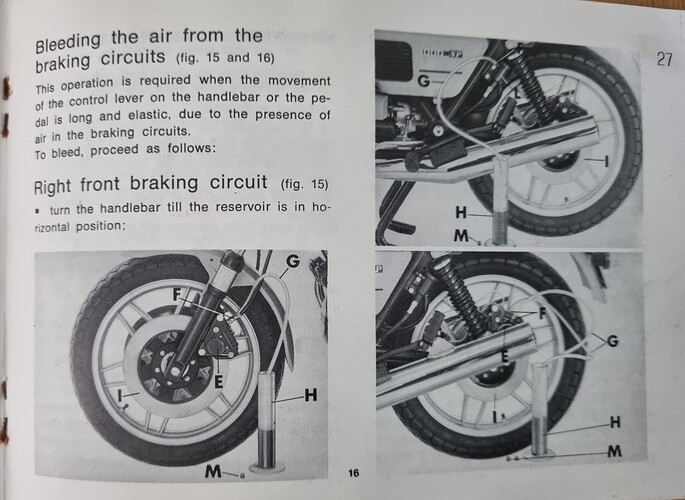
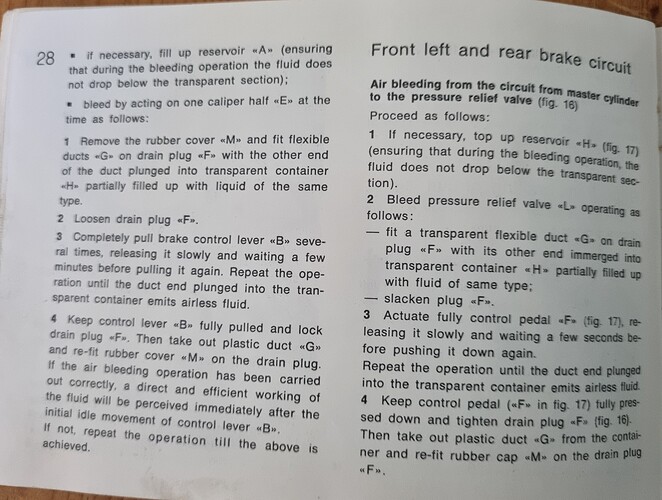
Don, is there any specific sequence for bleeding the rear (& FLH) brake circuit? Last time I did one it was in 1985, so memory is a bit hazy!
Thanks.
I start by bleeding from the splitter valve first (be very careful as this is a small nipple and easily sheared) then the rear and then the front. I have taken to using a vacuum pump to pull the fluid from the master cylinder to each nipple. Make sure you keep an eye on the level in the reservoir as it pulls fluid through quite rapidly. It may be advantageous to remove the front caliper and hold it up higher than the frame tubes so the air rises to the caliper. Once finished, pump the pedal up and down for a couple of minutes to seat the caliper pistons.
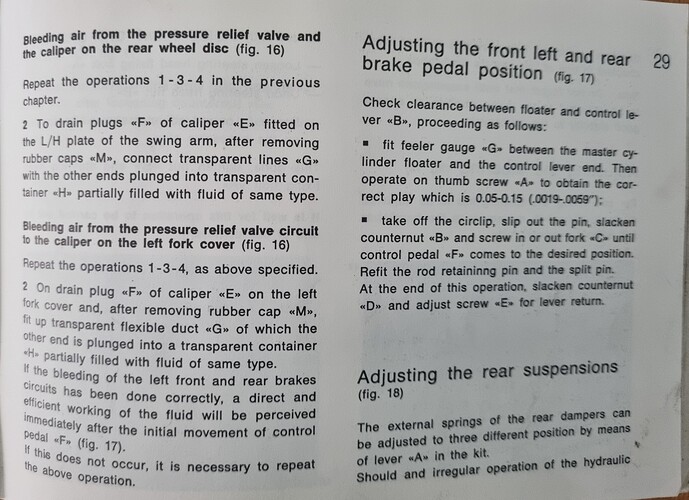
Tha handbook does tell you the factory way.
Just to throw in…the LM1 has a splitter manifold, not the proportioning valve, like Don’s Spada ( and the pics posted ). Unless you’ve added one, there won’t be a bleed nipple on the splitter.
Like you, I use a vacuum bleeder these days and find it works fine on the linked setup. I start with the back, then go to the front. It’s really no different from a twin disc front end with single line to the master cylinder, except there’s some up and down, as Don says.
I do find it doesn’t come right straight away. Once you’ve bled what looks like all the air in the system, leave it 24 hours for the fluid to come out of shock. The fluid gets squirted through a lot of holes with air around. Then a quick bleed to get whatever air comes out of solution in the calipers and you should be good to go.
Before you start, do make sure you’ve fitted stainless steel bleed nipples. The originals are plated and only M6. The usual reason for scrapping calipers is sheared off bleed nipples, they always seize and break.
Thanks both for your help. Spanners at the ready!
Oh, and if you do use the vacuum bleeder, I find that the M6 Brembo bleed nipples leak air through the threads. You’ll always have bubbles showing in the tubing, even once the air is out of the system. You just have to judge/guess when the only air you see is coming through the nipples.
Steve, if you’re putting this together from scratch, without hoses then I’ve thought of a gotcha.
When you get new banjo bolts, make sure you get ones for Brembo master cylinders, available from Demon Tweeks, ( I don’t think there’s a problem with the calipers ) or use particularly thick copper washers. Brembo seem to use a slightly shorter than standard length. If you don’t there’s a chance the bolt will bottom out in teh casting without clamping the copper washer properly. They do something similar on the disc to carrier bolts on the front discs, too.
https://www.demon-tweeks.com/uk/goodridge-banjo-bolt-stainless-steel-gdrsbk992-03-31c/
I posted the following about Past Parts some time ago for the same issue but imagine the pricing has increased but still a good solution. Worth checking that the repair kits are available first before resleeving, as I hear the availability of genuine PS12 repair kits for the single front disc are limited.
A replacement master cylinder is obviously an option but if you would like to retain originality, and original parts no longer available (don’t think Brembo round reservoir PS12’s or the rears with the integral cast reservoirs are), it’s possible to get them sleeved if it’s only the bore that is corroded/pitted from standing in a barn or similar. The cylinder is bored out and a stainless sleeve pressed in and bonded in position, the two small holes to the reservoir are drilled and then the sleeve reamed to size, and you can then fit the new piston, seals, spring, etc that come with the kit. One of the companies that do this is Past Parts in Bury St Edmunds, around £50 plus VAT + shipping, and obviously + cost of repair kit.
I think their website has a video of the process which explains things quite well.
I didn’t know this was a ‘thing’, but apparently quite a common on classic cars where OEM parts are no longer available. As the sleeve is stainless then it’s not going to corrode if left standing with water in the brake fluid.
