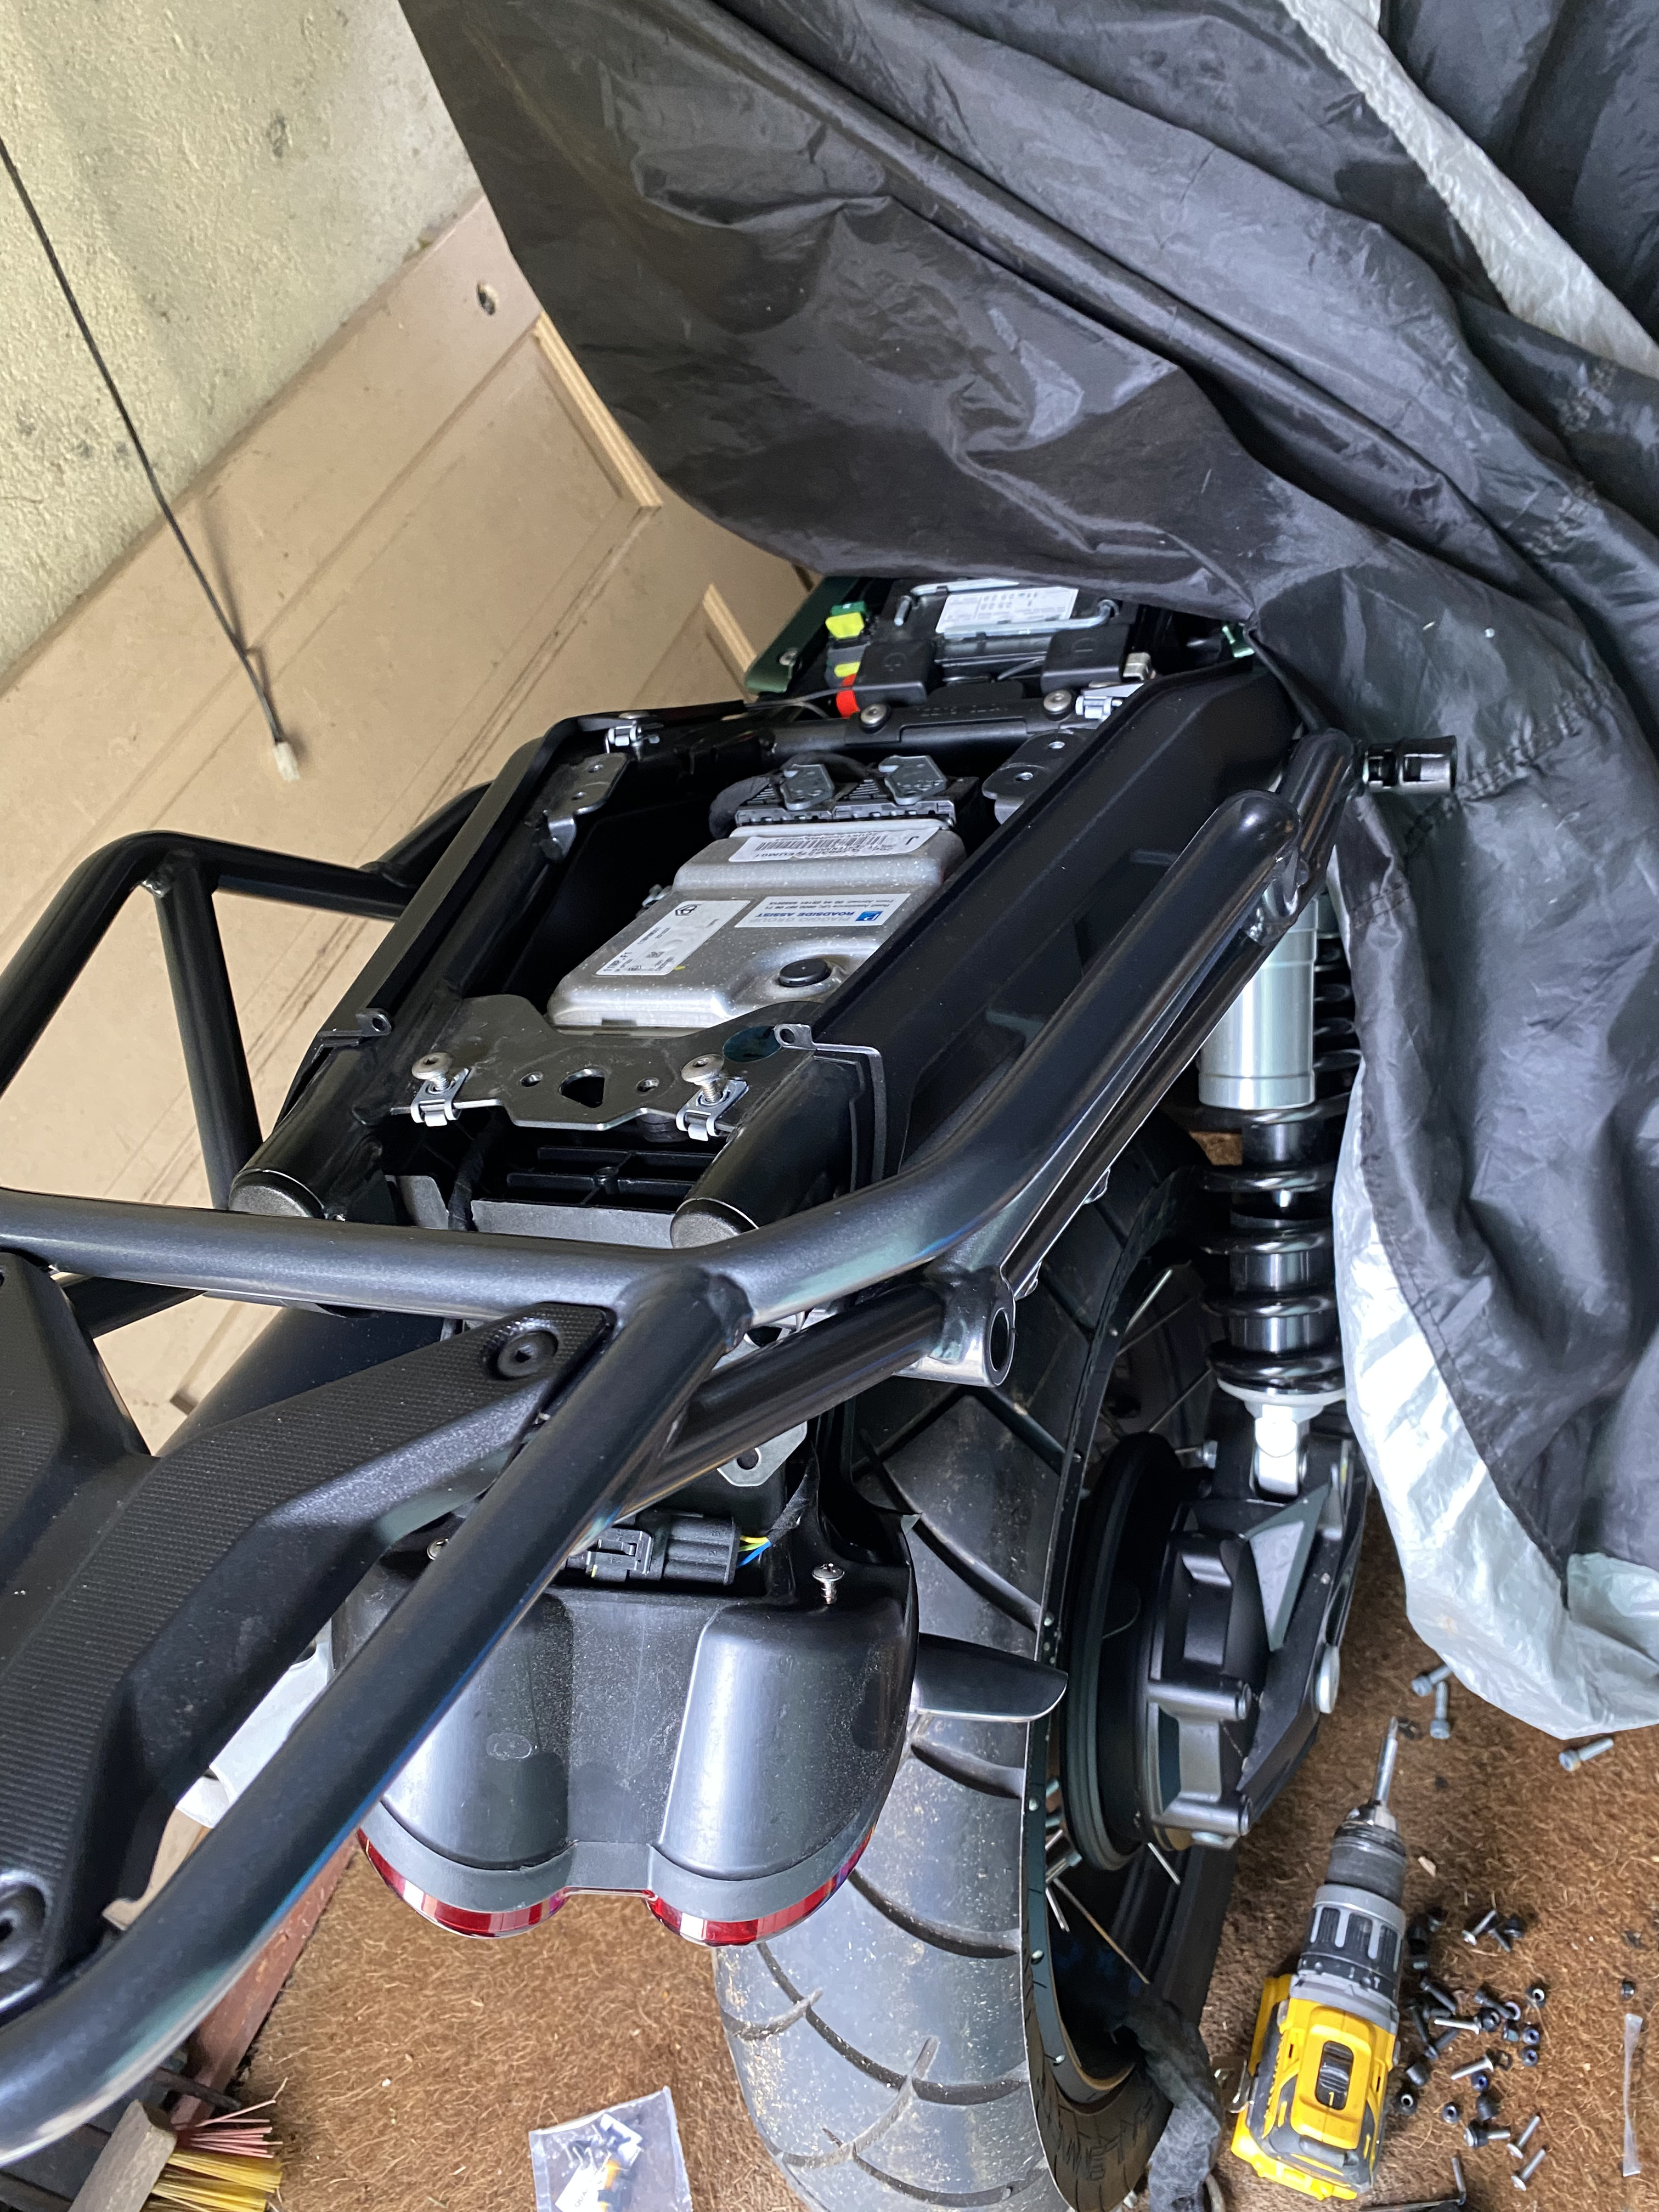
Decided to fit Givi quick release frames on my V85 this weekend. Must admit it took quite a bit of dismantling in order to fit
- Quick release housing that go through top box frame
- Rear number plate bridging section which forms rear connection to frame.
Required buying an additional number plate mounting plate once all nuts and bolts connected.
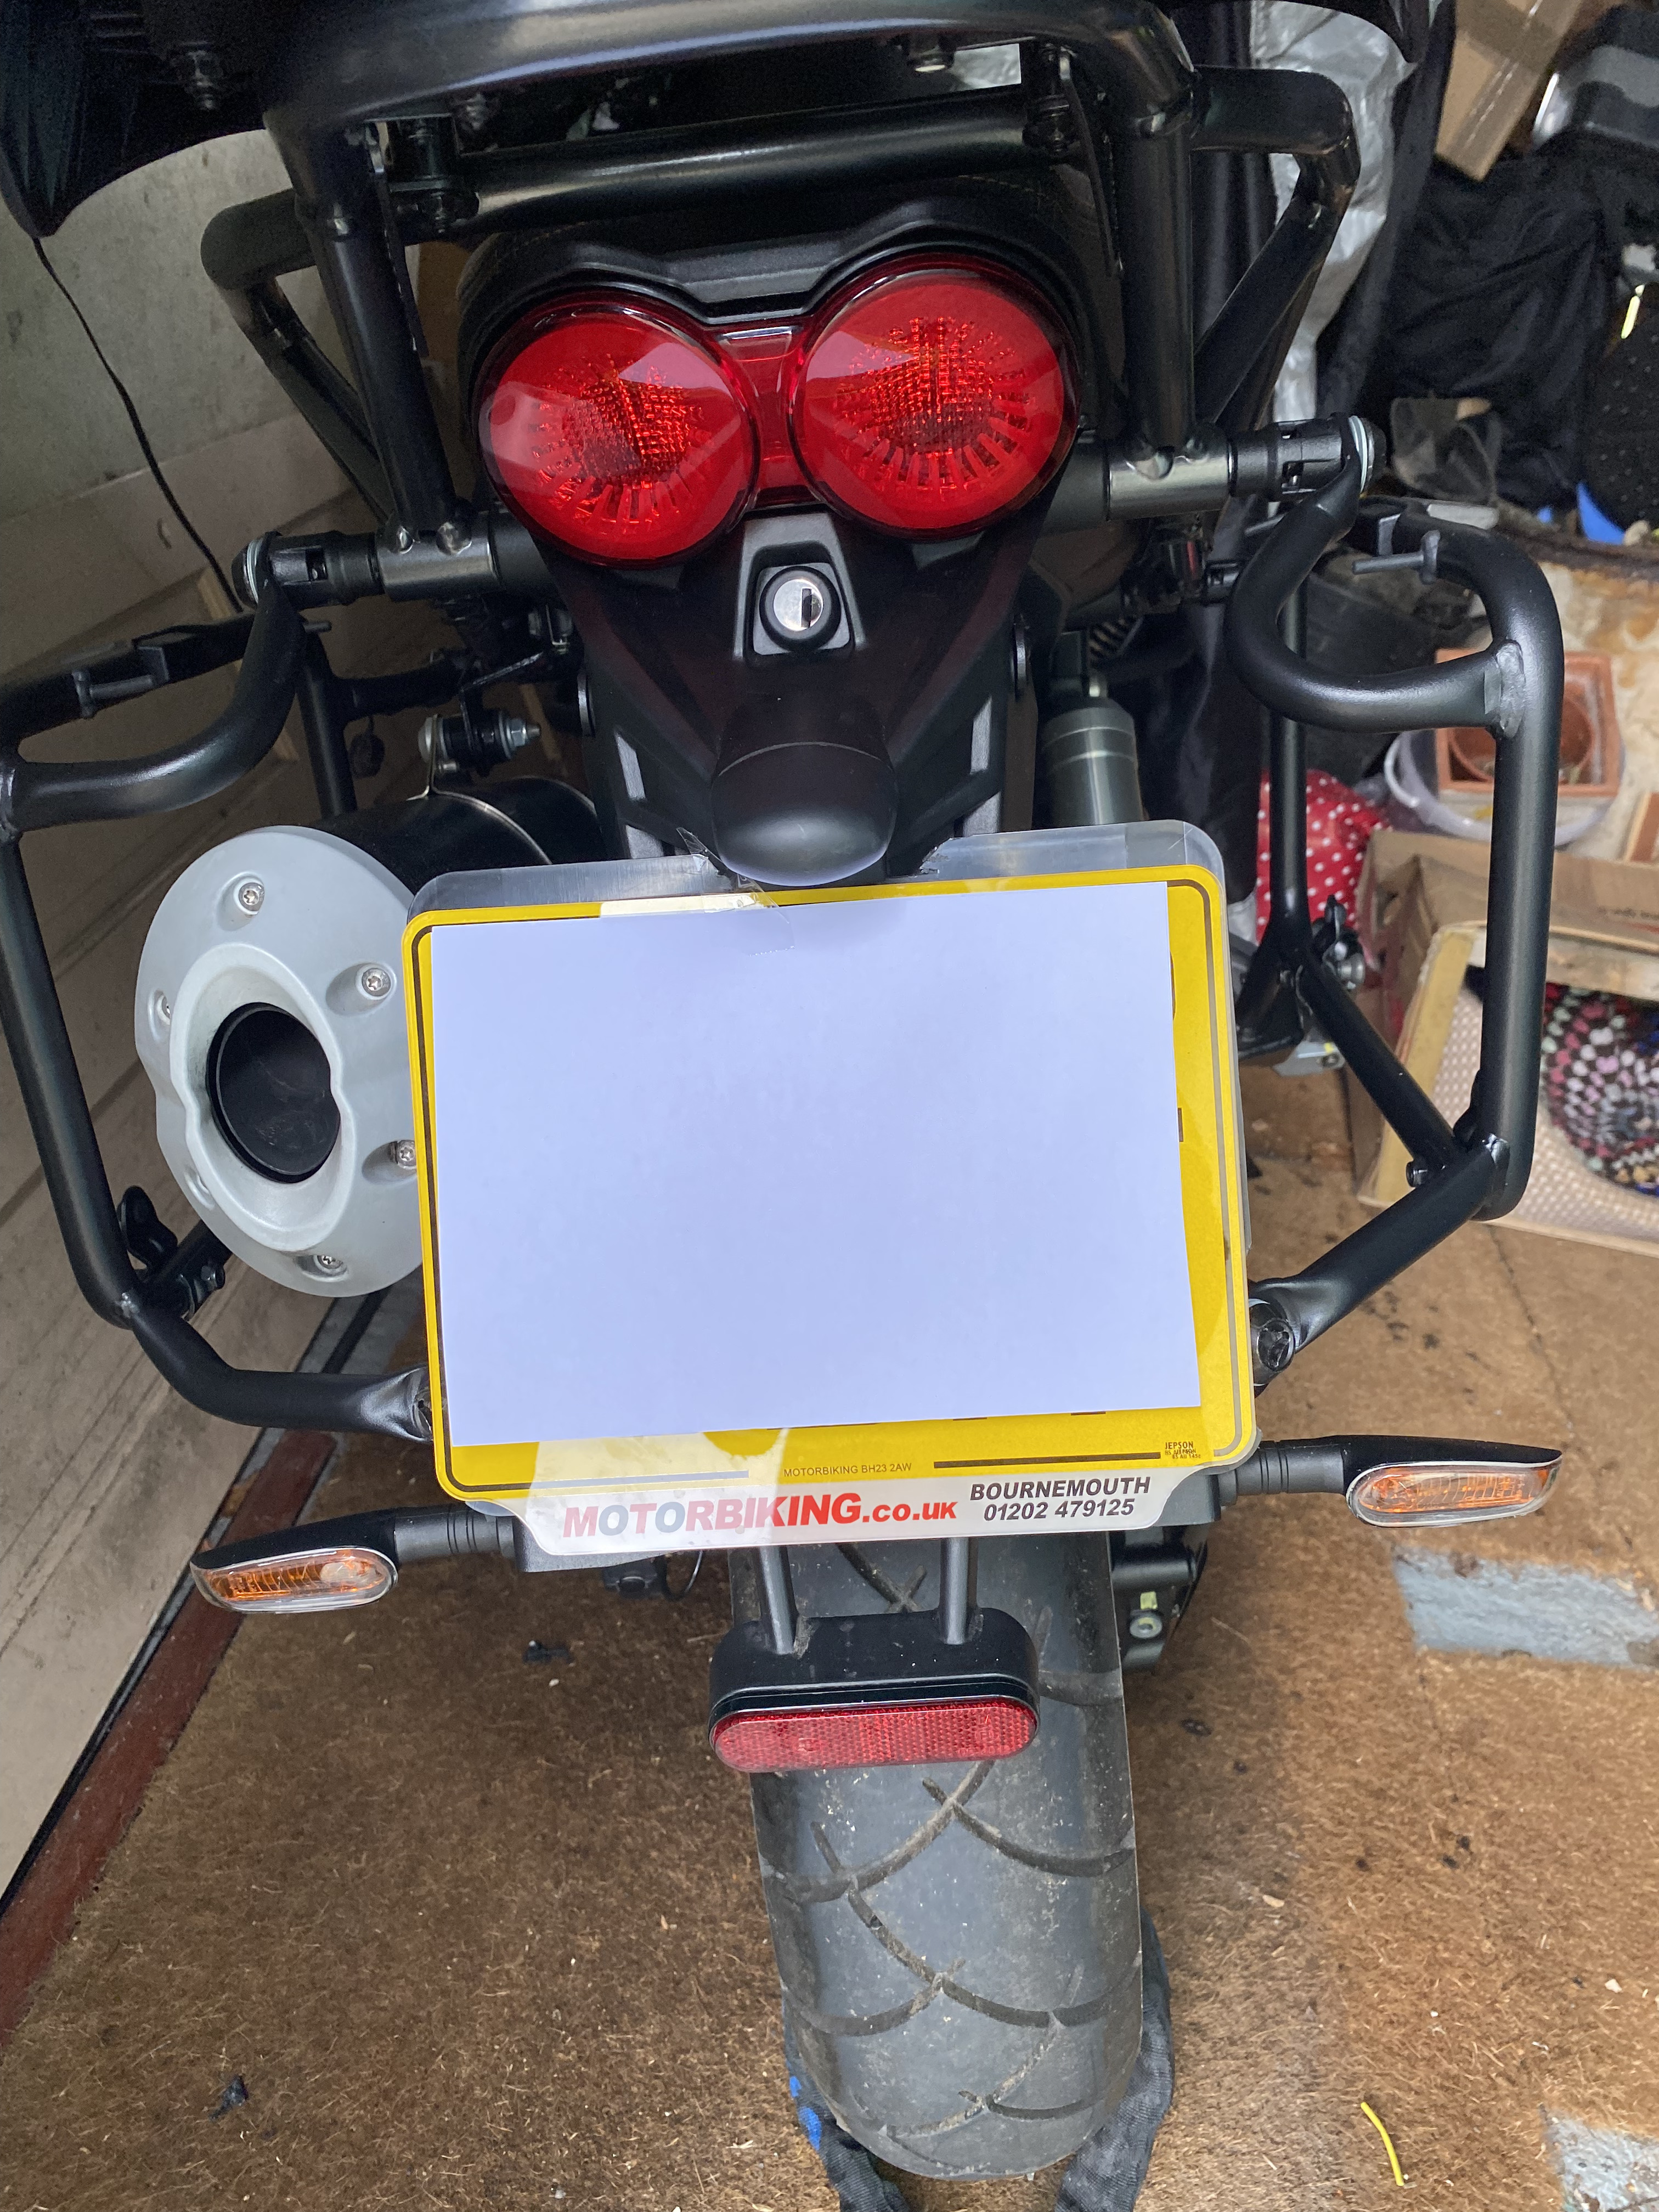
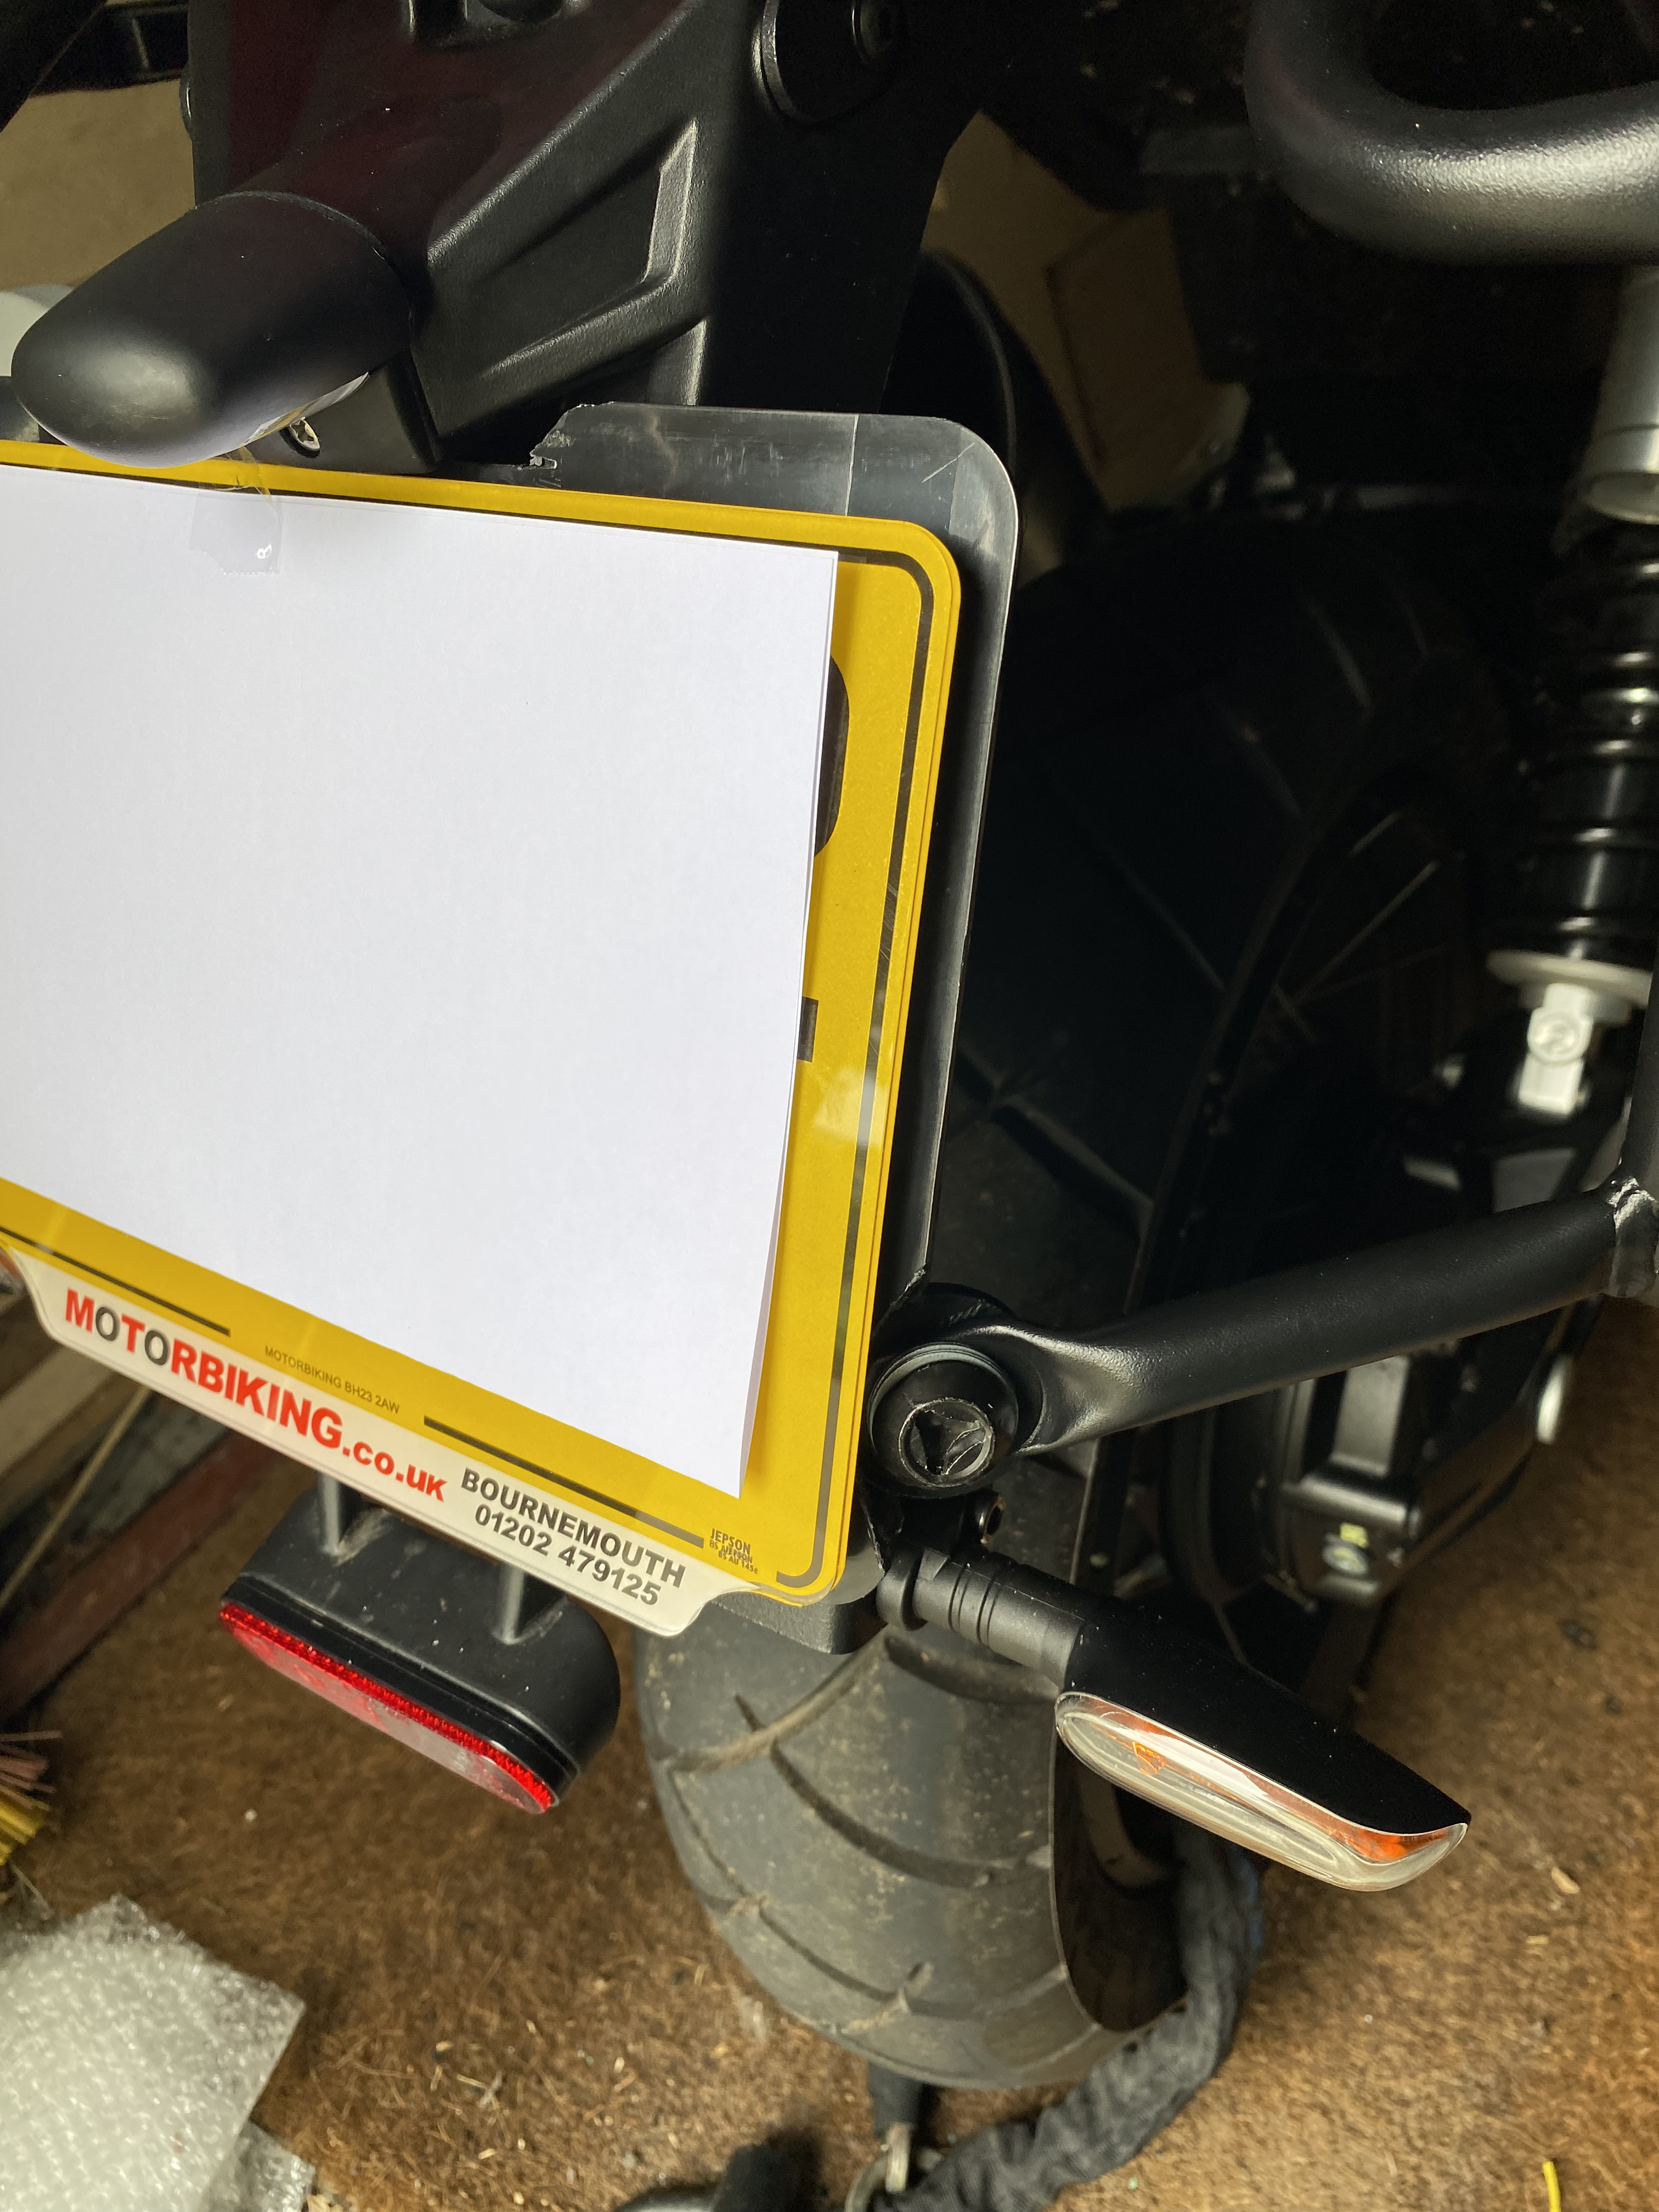
On reinstalling rear tail light unit and various other parts, had to then cut awat part of number plate housing as standard UK plate over lapped hole that rear quick release sprigot tightens!
Still working on reducing Vehicle Registartion Plate (as i assume other coutires plates are smaller) without splitting or damaging it, for same reason.
Just installed additional spoiler to Powerbronze windscreen and also rabbit ears to reduce buffering.
Will see how it all goes and report back?
1 Like
I went and bought proper hex head bits yesterday that have a socket with them for using a ratchet. i would recommend getting a set if you don’t already have them.
Using allen keys on the lower down parts of the bike isnt really suitable, I had to make do with what i had though on Friday.
The bash guard bolts have been out and in many times at dealer when it’s been serviced and i discovered he uses red locktite on them, which doesn’t want to let go 
I decided to run the engine for a few minutes first and they came out easier then. I’ve cleaned the bolts off and reassembled using blue locktite instead because that’s what i had to hand from a brake disk previous job on another bike. hopefully blue will still be strong enough and also easier to remove.
Finished the pannier carriers and top box plate. Think Givi design for continental smaller number plates as our are bigger. I’ve had to stand the registration plate off the back plate by a centimetre, so the back spriggot fitting on frame, doesnt catch it on insertion and removal.
I like Givi stuff, but those indicators look a bit vulnerable.
Me too and generally a straight forward fit. This one was a little ‘think outside the box’ after removing numerous screws and parts.
How did the rabbit ears work out, thinking of trying them. Cheers Mark
I am fitting the Givi PLOR8203MK “PAIR OF QUICK SIDE FRAMES FOR MONOKEY”.
Three problems so far
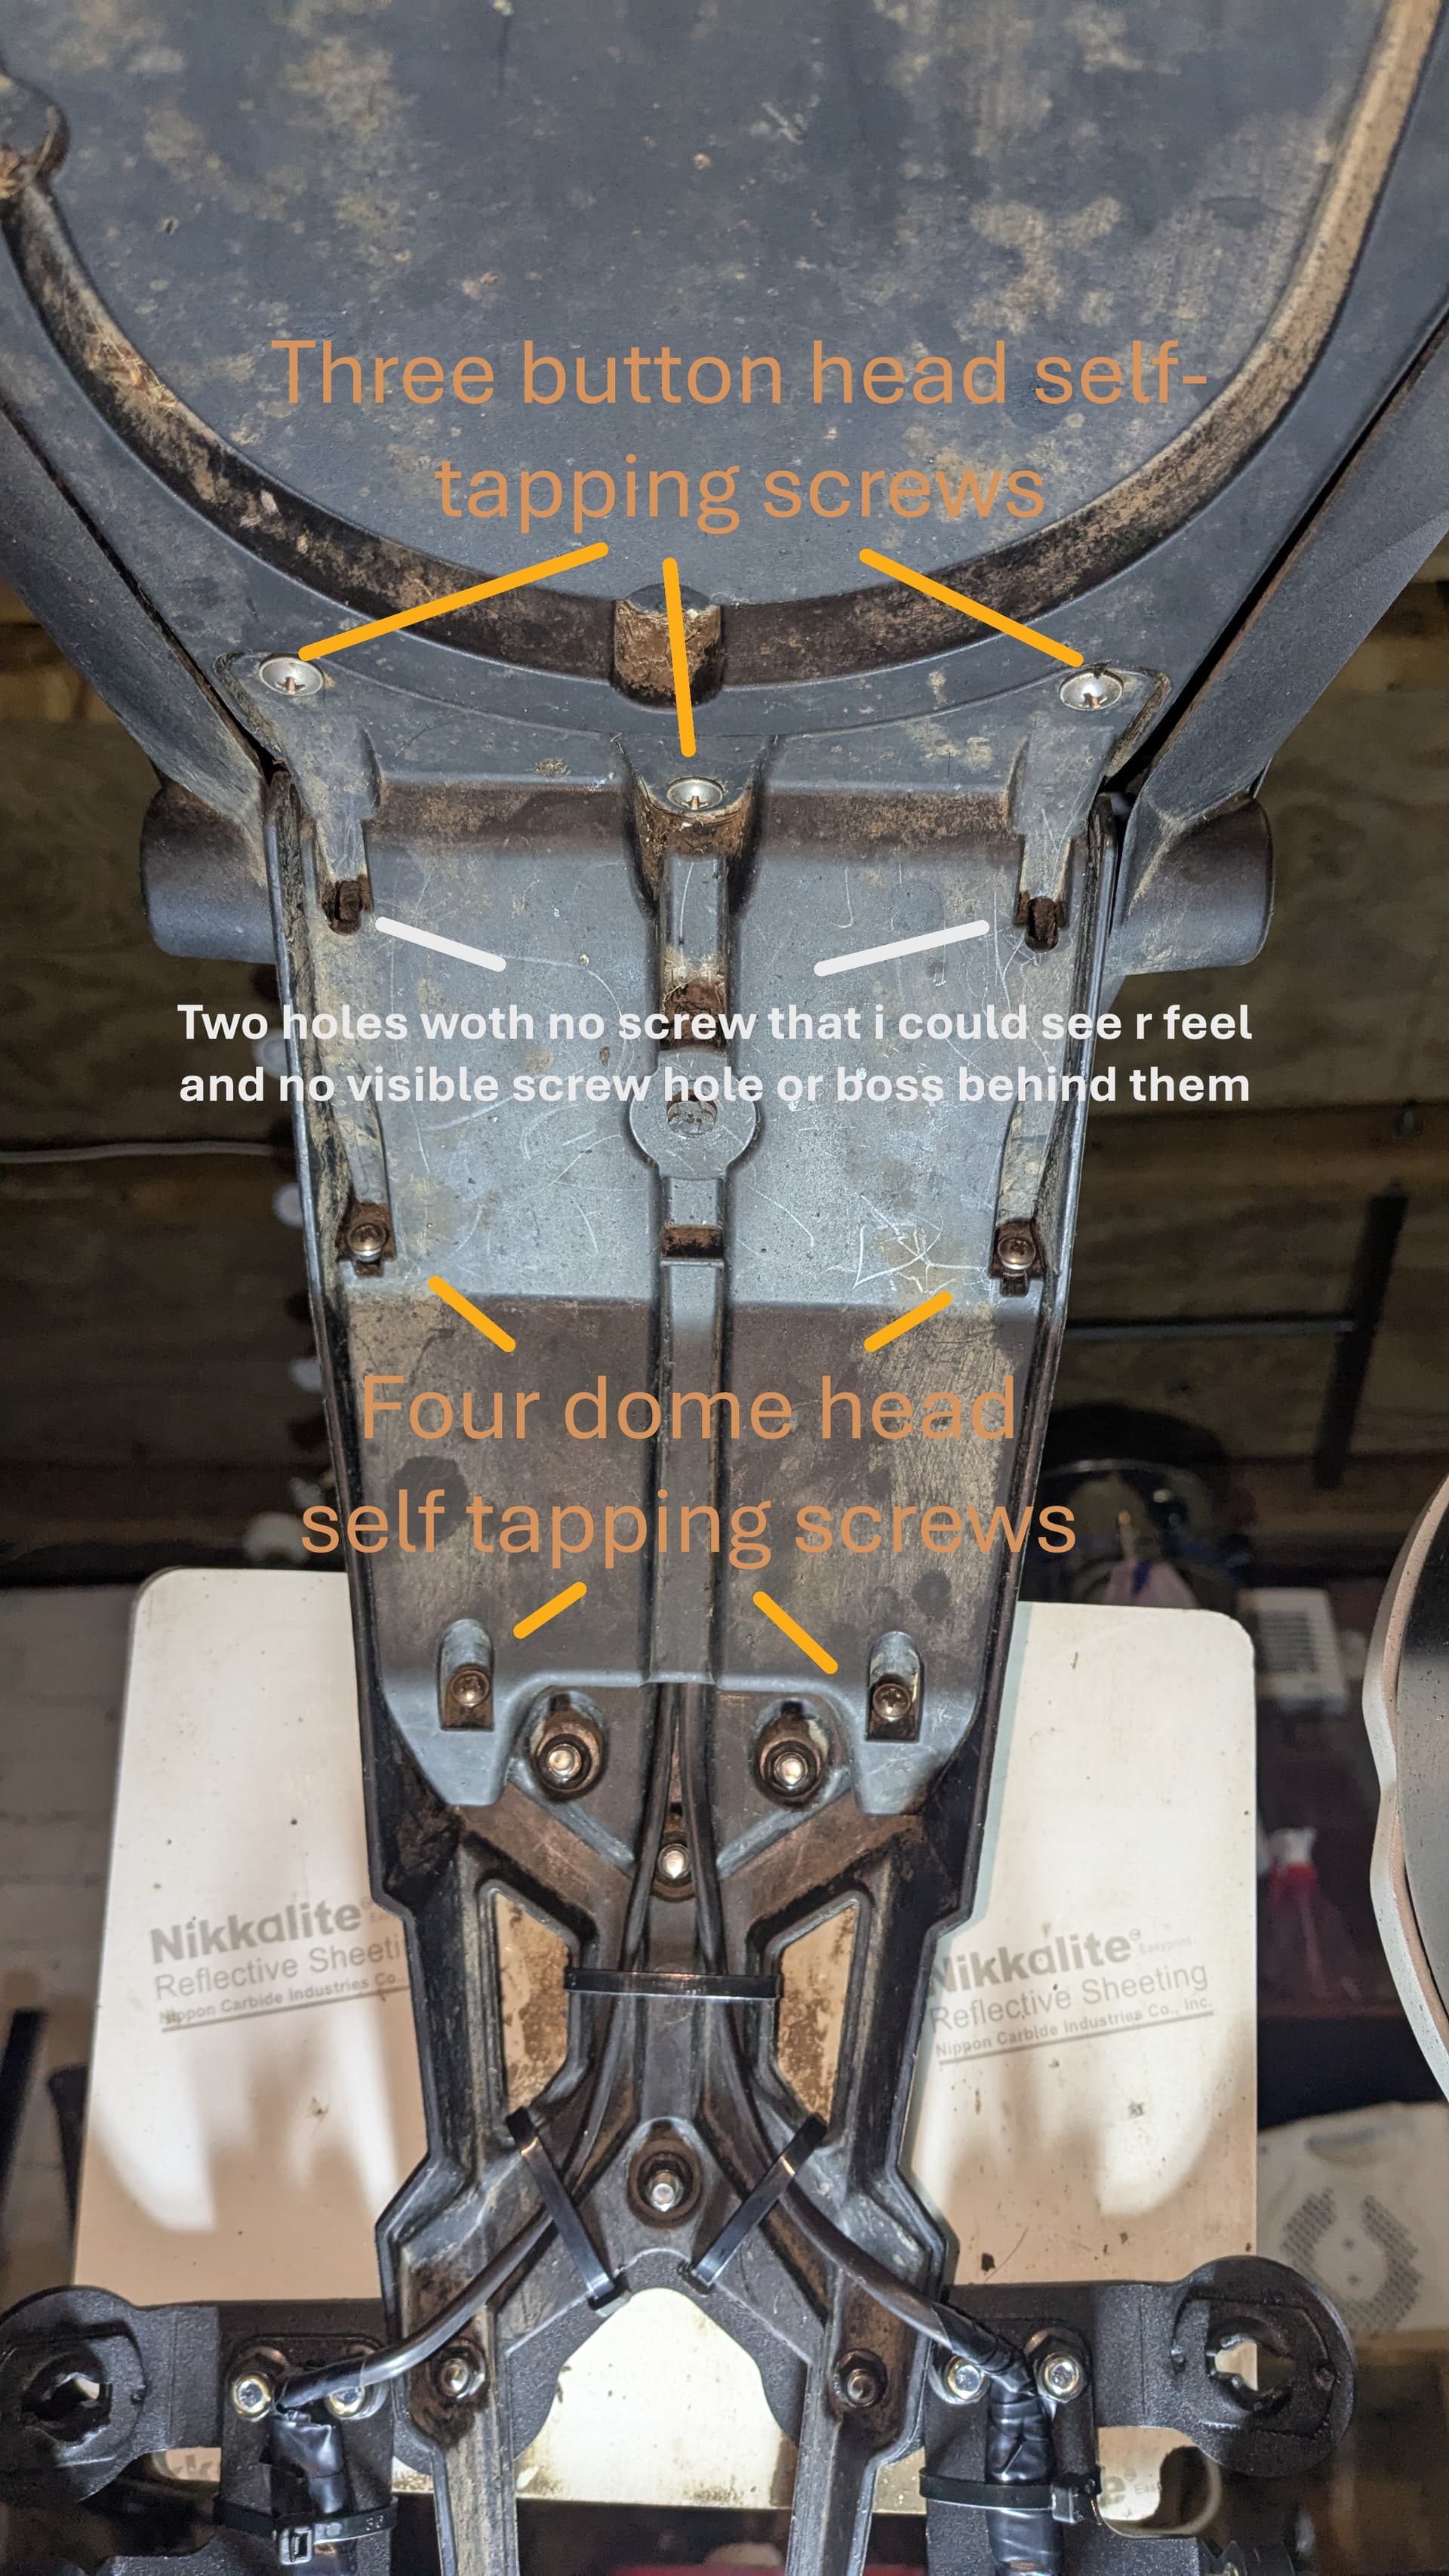
(1) I never did find out where the centre fixings on the plastic cover over the indicator wiring were! I found 7 screws but apparently there are 9. Found holes for 2 more but not screws - It still would not come off so I did the wiring via bending it. @tonybrode how did you get this off??
These next two maybe because design or quality has changed since 2023
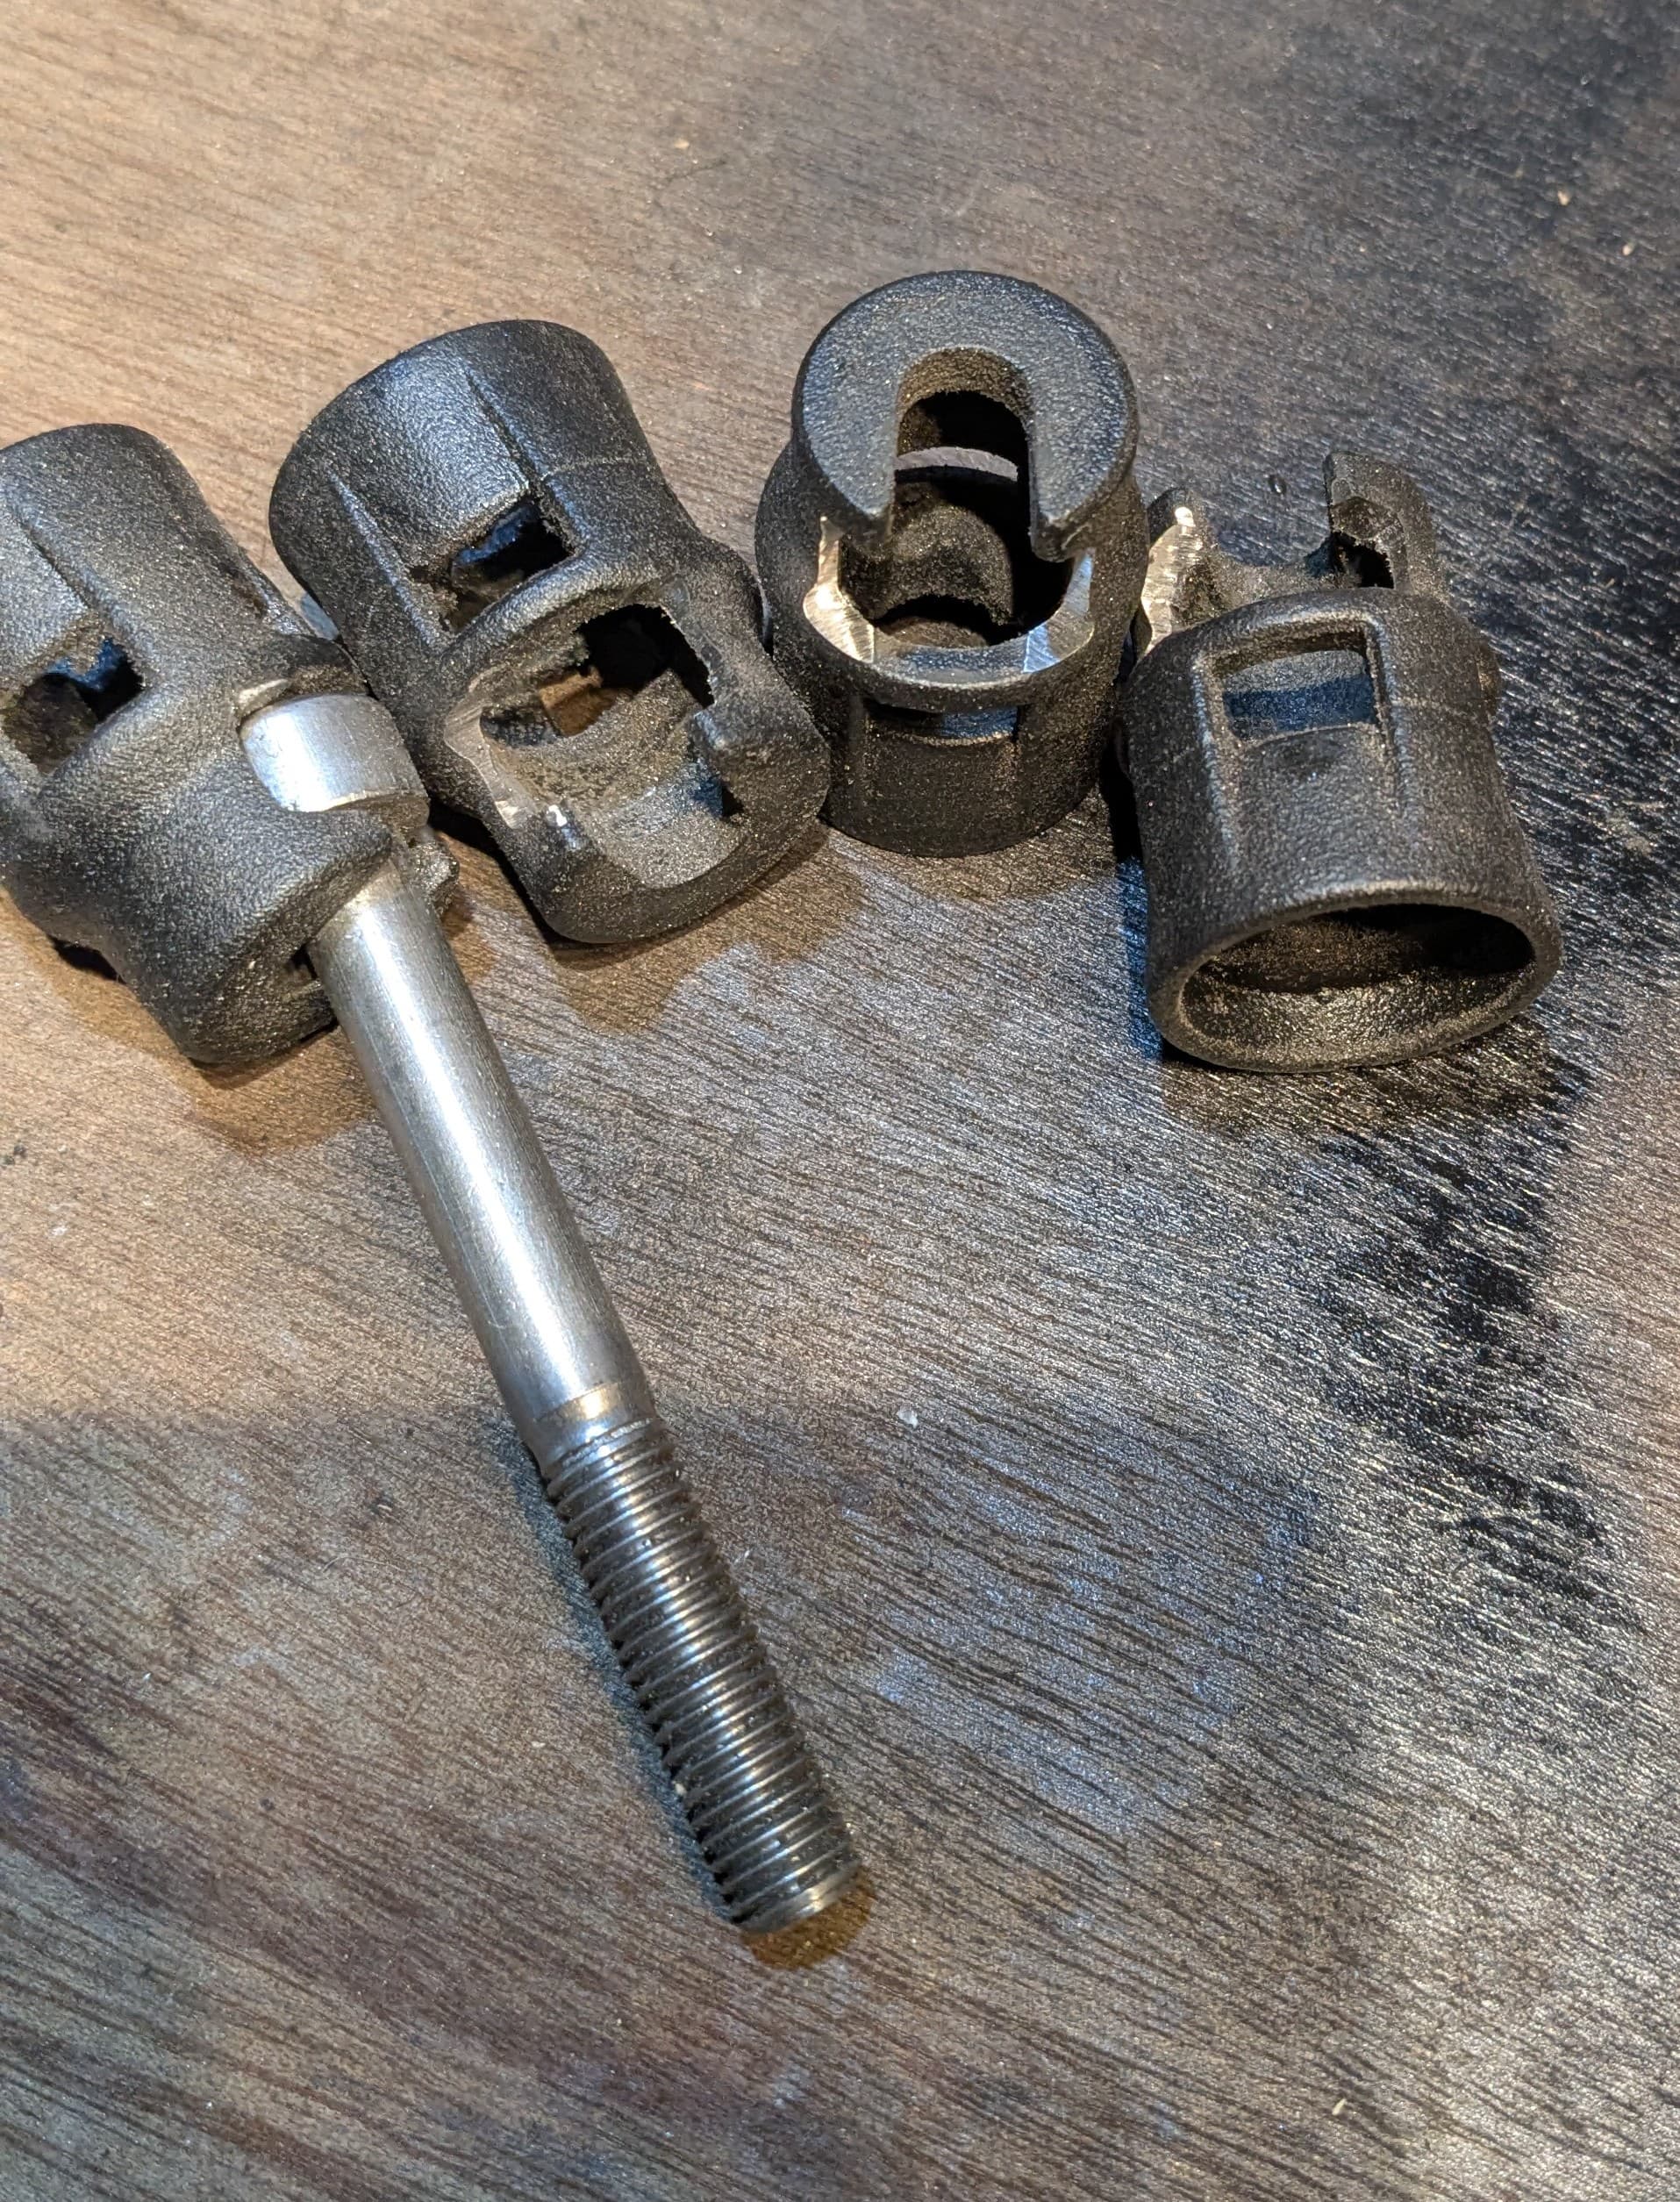
(2) The 4 x8mm button head Allen screws that Givi supply for the top mounts are 4mm too long for the thread in the holes - they bottom out before pinching the fittings tight so need to be shortened.
(3) Aprilia ask for 25Nm on all 8mm bolts unless otherwise specified. But these same button-head Allen screws that Givi send start stripping the hex out of heads around 20Nm. As these 4 bolts now hold both the panniers and the carrier - i would rather they were tightened to spec.
These last two points can be rectified by taking a dremel to the top mounts for the pannier frames. If you open the slot at the base where the Allen screw head goes in you can fit a normal cap head Allen screw of the correct length which will happily take 25Nm .
See pix