Starter motor - big block, square fin.

Here’s what I’ve learned during a recent hiatus.

Issue: Tried to start, but just a loud-ish ‘Click’.

Proposed solution: A replacement starter motor. Mine is a Spanish Bosch starter.

So, I looked at the Gutsibits web site - it’s my first point of call for pretty well anything. I also looked inDave Richardson’s ‘Guzziology’, which again, I try always to do.

Dave Richardson seems to think that the bike shouldn’t be fussy…

Gutsibits has what seems a bewildering array of options:

  • Used starter motor (seems to fit almost everything!)
  • Starter motor brush sets (i.e. DIY re-build)
  • Replacement solenoid (as mine clicks loudly, I presumed it was working)
  • Brand new ‘budget’ starter and solenoid
  • Reconditioned Bosch starter & solenoid (exchange only)
  • New Valeo starter motor and solenouid
  • Reconditioned Valeo starter and solenoid (exchange only)
  • Used Valeo starter and solenoid

Costs for the complete start varied from £60-90 to £231. Lowest in price is the used Bosch, and most expensive is a brand new Valeo unit.

So, I visited eBay and took a look there. I found, for £50(!), a new model, listed as suitable for a California. On examination, it looked exactly the same is the ‘budget’ starter available from Gutsibits. So, I ordered it. It’s quite a bit smaller than the old Bosch one, but the solenoid is larger.

On fitting, I noted that it’s a very tight fit. The solenoid cover interferes with the head of the left hand mouinting bolt for the neutral switch (to be fair, the Gutsibits information hints that it’s a tight fit, warning that “You may need to fit hex headed neutral switch bolts on some pre 1990 models to make room for the solenoid”. I had to fit a slimmer washer, and also grind away a part of the bolt head (mine were already hex headed). But it’s all okay, and the bike starts nicely.

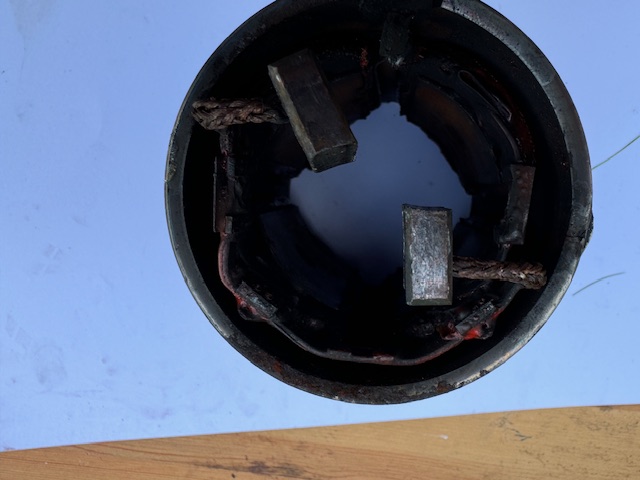
So - a sucker for punishment, I found two Web descriptions of starter motor overhaul. One by Greg Bender, the other on the Wild Guzzi forum. So, I took the old starter apart, cleaned everything (plenty of brushes still present) and re-assembled it. Filthy job, and it didn’t work, even afterwards. I’d thought the rotor was seized (and it did seem to be) but on refitment, it still didn’t work. Oh, well. At least I got to see how it was made.

Oh yes - one wrinkle. Don’t forget that the starter is connected directly to the battery positive terminal. So, do remember to disconnect the battery earth before attempting to remove this lead. If you don’t, there will be sparks! I know…

That’s all for this - the super-budget starter seems ok to me. We’ll see how well it survives the weather…

Nick

2 Likes

Hi Nick,
I fitted a budget starter motor at the start of the summer, it’s been fine👍
Comparing the budget one against the dead Valeo one the casting marks are exactly the same🤔
Phil

Hi Phil,

That’s interesting - given that the budget starter is made in China. I’ll bet the original Valeo wasn’t! Maybe they took an original and cloned it.

Nick

I reckon so :+1:

I used to work for the Prince of Darkness, J Lucas Esq, in their starter overhaul section. Common reasons for the click and no start syndrome are worn starter brushes and dirt solenoid contacts or rusty solenoid body. To check for worn brushes, take the starter out of the bike, +ve lead to the wire going to the starter from the solenoid, and -ve to the starter body. If it kicks over (hold on tight!) the brushes/motor is OK. To check whether the solenoid is pulling in properly and making its contacts, put a multimeter over the two large positive solenoid contact and the wire going from the solenoid to the starter using a resistance reading. Move the fork and gear in the starter bell housing as far forward as it will go. If it shows open circuit, disassemble the solenoid from the motor and clean the body of the plunger with fine emery cloth. Look inside the solenoid housing and clean up the two contacts at the bottom of the tube, again fine emery cloth is ok. Spray everything with contact cleaner and reassemble. Repeat the continuity test and it should now show contact is being made. About 2 hours work for the first time. Hope it helps. Jon

That’s interesting. I’ll give it a go and report back.

OK - I’ve had a go…

I connected a battery (positive to the connector between solenoid and starter) and then connected the negative to the casing of the starter. Got a flash/spark, but no motion. I figured that the motor was at least getting power to the field windings.

So, I dismantled (easy, second time around):

Here’s the rotor, and a picture of the commutator:


I didn’t think it looked too bad. Pretty manky, but given that the engine has about 50,000 miles…

and here’s the brush holder:

IMG_0516

You can’t see it very clearly, but there’s plenty of carbon brush there. Again, pretty manky.

Here are the brushes in the motor body:

IMG_0517

… again, a reasonable amount of carbon brush.

So, I reassembled the thing.

As you can see, it’s really grubby, but I did check for electrical continuity.

Then I put it all back together, nicely greased, and checked that I could turn it via the pinion gear (I could). Then back to the battery on the workbench…

… and no change; just a flash/spark. No sign of any movement at all.

I suppose the next thing to do would be to change the brushes and carefully clean everything, including the commutator. But I have already bought a new starter motor, as I said before. So, I’m inclined to chalk this down to experience.

Thanks for listening!

Nick

There is a good guide to rebuilding the Bosch starter on This Old Tractor, it may help

Thanks for this!

Yes; I’ve read those instructions. Like all of the material posted there, it seems helpful. I think it makes the refurbishment look more complex than it is - but then again, my starter still isn’t working!

Nick

First thought. Actually, I think those brushes look very short, so worn out. This then means the springs aren’t pushing them onto the commutator very hard.
Secondly, the grooves between the commutator pads might be clogged with carbon and conducting between the wiring coils. You could scrape them out to clean them.
Lastly, where do you live ? Brandon Auto Electrics in Suffolk are brilliant. They rebuilt my Bosch ( Tonti ) starter for me a few years ago and did a great job. I’ve used them for other vintage starters and things, too. Always been very pleased. Personally, for the money, I wouldn’t bother doing it myself any more. They’ve got the experience, the test equipment and contacts in the industry for locating/making parts.
Otherwise, just put it back together and keep in the parts bin for future reconditioning when needs must.

Thanks for that - especially the reccommendation.

The brushes aren’t hard to replace; you just have to solder them in. The commutator looked ok to me - the grooves didn’t seem clogged. But that’s a good hint.

I’ve decided to put the thing on a shelf in the garage for now. It’s at least a bit cleaner now. I’ll use it if/ when the new one I bought dies.

Interestingly, reading on line about the starter and solenoid, it seems that the Valeo starter is a bit more efficient - draws less current and is more compact. Don’t know whether that’s backed up by people’s experience…

It’s certainly what Dave Richardson ( Guzziology ) reckons.